How to Grow Export-Quality Onions Using the Right Seeds
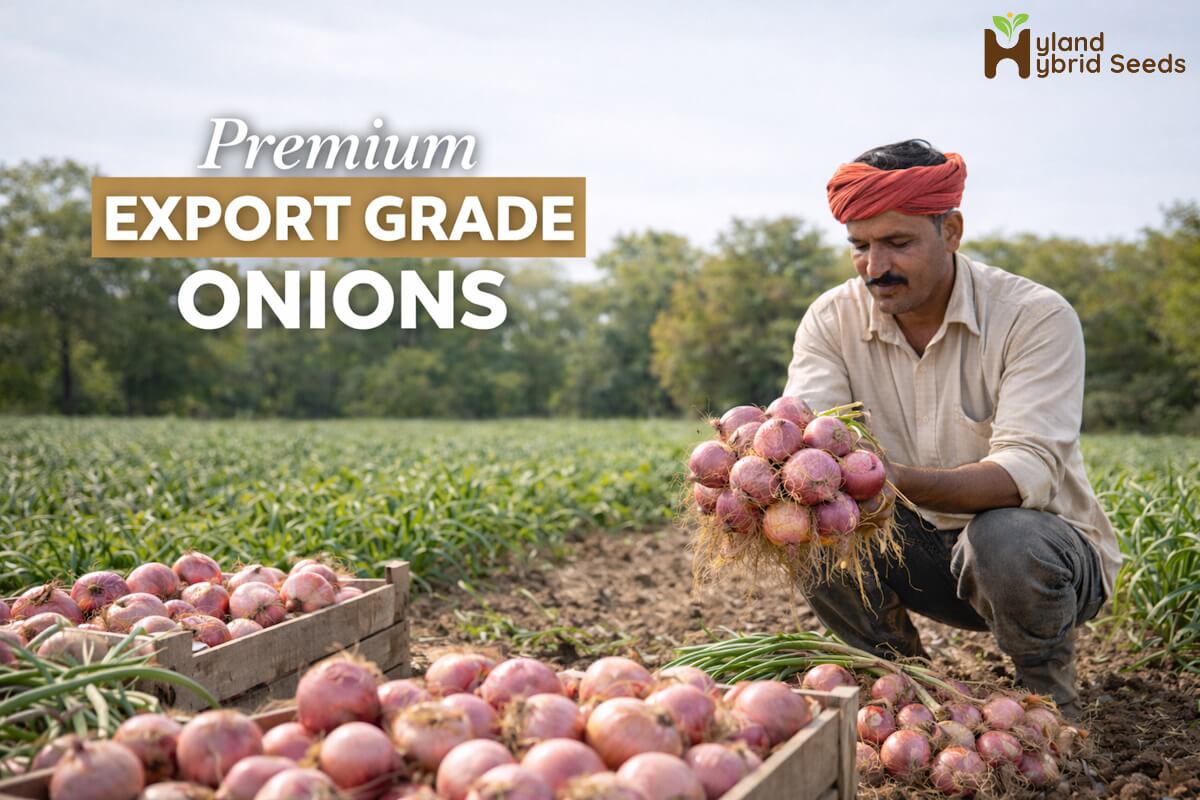
Onions show up in almost every kitchen, but export buyers do not shop like home cooks. They buy like inspectors. They want a crop that looks consistent, holds up in storage, survives long shipping routes, and lands in good shape even after weeks in a container. If you are aiming for onion export, you are playing by a stricter rulebook. Size range, bulb firmness, skin color, neck dryness, and shelf life all count.
Even a “good” onion can get knocked down to a lower grade if the lot has mixed sizing or weak skins. So where does export quality start? Not at harvest. Not in the packing shed. It starts way earlier, with the seed you put into the ground. Pick the wrong variety and you will spend the season trying to patch problems that never really go away. Pick the right one and your daily decisions about water, feeding, and disease control actually pay off. Let’s walk through the full process in a practical, farmer-friendly way.
Want to grow onions that meet global export standards? Get expert guidance tailored to your region and market goals.
Contact UsStep 1: Choose a Variety That Fits Export Demands
“Good onion” means different things in different markets. Some buyers want deep red color. Some want golden skins. Some care most about shelf life. Others care about uniform medium bulbs that fit retail packs. Before you even compare seed catalogs, get clear on these points:
- Target market: Middle East, Southeast Asia, Europe, the US, or a regional buyer
- Preferred color: red, yellow, or white
- Bulb size range: small, medium, jumbo (buyers often specify exact counts per bag or box)
- Storage window: short-term sales vs long storage and sea freight
- Season and day length: short-day, intermediate, or long-day types based on your region
Export buyers usually lean toward lots that are uniform. They want a shipment where one bag looks like the next bag. If your field produces a mix of shapes and sizes, sorting becomes expensive and you lose volume to rejects. Also, pay attention to dry matter and skin strength. These traits are not flashy on day one, but they decide how your onions behave after curing and during shipping.
Step 2: Why Seed Quality Is the Make-or-Break Factor
Let’s be blunt. If you start with weak seed, you can still get onions, but you will fight uneven germination, patchy stands, mixed bulb sizes, and higher disease pressure. That is not the kind of story you want when a buyer is inspecting a container load. Quality seed gives you:
- Strong and even emergence
- Uniform crop stages (which makes irrigation and feeding easier)
- More consistent bulb size and shape
- Better tolerance to field stress
When your crop grows evenly, every other step becomes simpler. When it grows unevenly, everything becomes a compromise. You end up harvesting across multiple dates or pulling bulbs that are either too young or too old. Export buyers notice that right away.
Step 3: The Real Value of Hybrid Seeds
If your goal is export-grade consistency, hybrid onion seeds are often the most practical choice. Hybrids are bred to deliver predictable performance when managed well. They tend to produce bulbs that match in size and maturity, which is exactly what you need when your price depends on grading. What growers usually like about hybrids:
- Uniformity: bulbs line up in size, shape, and maturity
- Plant vigor: strong early growth helps the crop compete and establish faster
- Disease tolerance: many hybrids carry better tolerance to common issues
- Higher marketable yield: fewer odd bulbs and fewer rejects
Does that mean hybrids are magic? No. You still need good field management. But with hybrids, you are not starting the season with a handicap. If you are serious about export, ask yourself a simple question: do you want to gamble with uneven output, or do you want a crop you can plan around?
Step 4: Work With a Seed Partner You Can Trust
Buying seed is not like buying a tool. If a tool fails, you replace it. If seed fails, you lose time, land, labor, and an entire market window. A reliable onion seeds supplier should be able to talk clearly about:
- Germination percentage and lot testing
- Seed health and treatment details
- Recommended planting season and day-length fit
- Expected bulb size range under standard spacing
- Storage behavior and skin strength
- Field results from regions similar to yours
If a supplier only talks about “high yield” and nothing else, push for specifics. Export quality is not a slogan. It’s measurable traits that show up in the lot. Another tip: keep records. Note which lot number you planted, how it performed, and what the grading results looked like. That history helps you buy smarter next season.
Step 5: Soil Prep for Bulb Shape and Skin Quality
Onions need a loose, well-drained soil so bulbs can expand without pressure or waterlogging. Heavy soil can cause misshapen bulbs and higher rot risk. Both problems create rejects during sorting. What usually works well:
- Sandy loam or loam with good drainage
- Soil pH around 6.0 to 7.5
- Raised beds where drainage is weak
- Organic matter that improves soil structure (compost or well-rotted manure)
Do a soil test before the season. It’s not a fancy step, it’s a money-saving step. A soil test tells you what is already present and what is missing, so you do not overfeed or underfeed. Also, remove clods and level the bed well. Uneven beds lead to uneven irrigation. Uneven irrigation leads to uneven bulbs. It always circles back.
Step 6: Nursery Care and Transplanting Done Right
Strong seedlings give you a better crop start. Weak seedlings never really catch up. Nursery basics that matter:
- Use clean nursery beds or trays
- Keep spacing reasonable, avoid overcrowding
- Water lightly but consistently
- Protect from damping-off and early pest damage
Seedlings are often ready in 6 to 8 weeks, depending on weather and variety. You want a seedling that looks sturdy, not stretched and thin. A pencil-thick stem is a nice sign. During transplanting:
- Transplant at the right depth (not too deep)
- Maintain uniform spacing
- Water right after transplant to reduce shock
Spacing affects bulb size. Tight spacing can push more medium bulbs. Wider spacing can push larger bulbs. Export buyers often specify what they want, so plan spacing around that demand instead of planting by habit.
Step 7: Feeding the Crop Without Overdoing It
Feeding onions is a balancing act. Too much nitrogen can keep the plant pushing leaves while the bulb stays soft. That soft bulb can break down faster in storage. Too little potassium can reduce firmness and shelf life. A practical nutrient approach usually includes:
- Nitrogen: for early vegetative growth
- Phosphorus: for roots and early establishment
- Potassium: for bulb firmness, skin strength, and storage life
- Sulfur: often tied to pungency and bulb quality
Split applications often work better than one heavy dose. It keeps growth steady and reduces loss from leaching, especially in sandy soils. Micronutrients can matter too. Zinc, boron, and magnesium show up in onion fields more often than people admit. If your soil test or leaf analysis shows issues, correct them early. Waiting until bulb formation is late in the game. One more thing: if you are producing for export, keep your input records clean. Buyers and auditors like traceability. Even if your current buyer does not ask for it, the next one might.
Step 8: Irrigation That Supports Export Quality
Onions have shallow roots, so they depend on consistent moisture. Big swings between dry and wet can lead to bulb splitting or uneven sizing. Splitting is a quick way to lose grade. Drip irrigation is popular for a reason. It lets you control moisture and reduces leaf wetness, which can lower disease pressure. Good irrigation habits include:
- Keep moisture steady during active growth
- Avoid flooding or standing water
- Reduce watering as the crop reaches maturity
As tops begin to fall and bulbs near maturity, many growers cut back irrigation to help skins dry and necks tighten. That tighter neck helps storage. A thick, juicy neck is trouble in shipping. Ask yourself while irrigating: are you growing a bulb for today’s local sale, or are you growing a bulb that must survive weeks of handling and transport?
Step 9: Pest and Disease Control Without Creating Export Problems
Export quality is not only about appearance. It’s also about compliance. Residue limits differ by destination, and shipments can be tested. Common onion challenges include:
- Thrips damage (silvering and leaf stress)
- Downy mildew in humid conditions
- Purple blotch and leaf spots
- Basal rot and storage rots
Field scouting matters. If you spray without checking, you waste money and you may create residue headaches. Use a plan based on monitoring, weather, and threshold levels. Also, manage the field environment:
- Proper spacing for airflow
- Weed control to reduce pest shelters
- Balanced fertilization (overfed crops can attract issues)
If you are targeting onion export, talk to an agronomist who understands destination requirements. “Works locally” is not the same as “passes in the destination port.”
Not sure which onion seeds variety fits your target market? Talk to professionals who understand seed performance and export requirements.
Ask ExpertsStep 10: Harvest Timing That Protects Shelf Life
Harvest too early and you get immature skins and weaker storage performance. Harvest too late and you risk splitting, disease, and sunscald. A common harvest cue is when 50 to 70 percent of tops have fallen naturally. Bulbs should be full sized with mature skins. During lifting:
- Handle bulbs gently to avoid bruising
- Keep lifted onions out of harsh sun for long periods
- Move them into curing quickly
Bruises do not always show up on day one. They show up later in storage, right when the buyer is opening bags.
Step 11: Curing for Tight Necks and Clean Skins
Curing is where export quality can be won or lost. Proper curing dries the outer skins, tightens the neck, and reduces rot risk. Basic curing goals:
- Dry, papery outer skins
- Necks fully dry and closed
- Bulbs firm to the touch
Some growers cure in the field if the weather is dry. Others cure under shade or in well-ventilated sheds. The method matters less than the result. The result is what buyers pay for. If you rush curing, you may pack onions that still have moisture in the neck. That can lead to mold during shipment. Containers can trap heat and humidity. A small mistake grows fast once the doors close.
Step 12: Sorting and Grading Like an Exporter
Export packing is not a casual job. It’s strict. It needs a mindset shift. Remove:
- Cut, bruised, or soft bulbs
- Split bulbs
- Bulbs with thick necks
- Bulbs with rot or visible disease
Then sort by size. Many buyers want uniform medium bulbs, but it depends on the destination and end use. Some markets want jumbo bulbs for food service. Some want medium for retail. Keep lots separated. Do not mix fields, harvest dates, or varieties in one lot if you can avoid it. Traceability and uniformity help you negotiate better pricing.
Step 13: Packaging and Handling for Long Routes
Packaging choices depend on the destination market and buyer preference. Mesh bags are common because they allow ventilation. Cartons are used for certain premium markets and retail supply chains. Whatever packaging you use, focus on:
- Ventilation
- Clean materials
- Correct net weight
- Clear labeling
Handling matters too. Tossing bags, dragging them on rough surfaces, or stacking with no airflow can raise damage and shrinkage. Export shipments can travel for weeks. You want onions that stay stable through that whole journey, not onions that look good only on loading day.
Step 14: Storage That Keeps Your Grade Intact
Even after curing, storage can make or break quality. Good storage usually means:
- Low humidity (to reduce sweating and mold)
- Good airflow
- Stable temperatures
- Stacking that allows ventilation
If bags are stacked too tightly, heat builds up. That heat can trigger decay. A little decay can turn into a lot of decay, fast. If you have access to controlled storage or cold storage, it can help, especially when you are timing shipments for price windows. Just make sure the storage plan matches the variety’s behavior. Some onions store better than others, and that circles back to your seed choice again.
Common Mistakes That Quietly Kill Export Quality
These mistakes show up in farms that “almost” make it in export, then get stuck in lower grades:
- Buying seed without checking day-length fit
- Using mixed seed lots or unknown seed sources
- Overwatering near maturity
- Overfeeding nitrogen late in the season
- Rushing curing to meet a loading date
- Mixing sizes in the same bag to save sorting time
If any of these sound familiar, you are not alone. The good news is they are fixable. You just need a tighter plan and better discipline in key weeks.
Putting It All Together
Export-quality onions are not an accident. They come from a chain of decisions that starts with seed and carries all the way through curing, grading, and packing. If you want to raise your odds of success in onion export, focus on the basics that buyers actually care about:
- Uniform bulbs that match the size spec
- Strong skins and a dry, tight neck
- Low damage and low decay risk
- Clean sorting and consistent lot quality
And yes, it starts with selecting the right hybrid onion seeds from an onion seeds supplier who can back up their claims with real details, not just big promises. Want a quick gut-check before your next season? Ask yourself:
- Do my onions come out mostly the same size, or is it a mixed bag?
- Do they hold up in storage, or do I see soft bulbs within weeks?
- Am I curing long enough for tight necks and dry skins?
- Is my sorting strict, or am I letting borderline bulbs slide?
If you tighten those areas, you will see it in your grade, your acceptance rate, and your buyer confidence. That’s when export stops feeling like a gamble and starts feeling like a real business channel.
Another rejected shipment hurts more than a better seed selection today. Get the best seeds for exports
Contact Us